Categories
Gaming

First impressions of a grail.

I’ve just finished having a minor spiritual experience.
My Odyssey, with all the goodies, overlays, light gun, game cards, accessories, etc., arrived at work tonight. It was all I could do not to ditch my duties and open the box right then and there. Ever since I got my first cartridge-based machine, the Odyssey 2, I always wondered what the original Odyssey was like. I’d read lots of stuff about how it came to be (vis a vis Ralph Baer and the Brown Box), how well it sold, what came with it, and so on.
But what was it like? That’s what I always wondered. What was it like to play it?
About a month ago, I saw an eBay auction for which I put up a fierce fight and paid pretty dearly after getting the wife’s somewhat puzzled and reluctant blessing on the whole thing, and so here it is. (I made an agreement with the seller that it might take me a week or two to gather the necessary dough, which was OK with him because he wasn’t sure how to ship it and would need time to figure that out – very classy guy.)
So here it is. I’m going to plug it in and play it some tomorrow (well, okay, later today since it’s well after midnight), and before I do that I’m setting up a camcorder on a tripod to record the “magic moment.” But for tonight, I just opened the box, very slowly, very carefully, like the lid was hinged. I think I heard Raiders Of The Lost Ark music in the background somewhere. I held my breath.
Othello's Odyssey
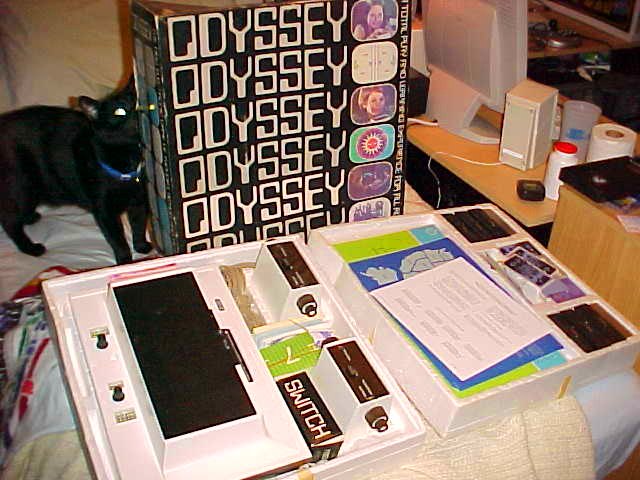
Even Othello looks up to it in awe. (As security chief of my house, Othello gets first dibs on inspecting anything of mine that comes in the door. If you’ve ever sent me a game, just know that he’s checked it out before I’ve ever gotten anywhere near a console or an RF adapter with it.)
First impressions?

  • It’s smaller than I thought it would be. For some reason, from the pictures, I’d always envisioned the Odyssey console as a damn great brick of a machine. Compared to some of its successors (i.e. the Odyssey 100-4000 series consoles), it’s positively petite.
  • This machine has been kept in outstanding condition. I’m guessing it probably went back to its box the same year it originally came out of it. This machine may have been boxed since the day I was born.
  • My God, all the little bits and pieces to keep track of. And I thought Quest For The Rings was nutty in that regard.
  • The controller cables are HUGE! And the connectors! Wow! Even HUGER!

I know there are 99,999 other Odysseys out there, and some of ’em even work, so this isn’t really that much of a grail, but to me, it’s a personal grail. I’ve made the journey back to where it all began. And now I can tell the story going forward, not backward.… Read more

Categories
Gaming Home Base

Game Room Remodeling Diary, Episode 6

Ahhhh, sweet victory, to have the house in one piece. And this room in it.
Aside from some very minor finishing touches, the new and improved room of doom is done. Here’s a look at the finished Odyssey 2/Atari 5200 section, with and without the overhead light:
PDF Game Room Remodeling
You may have noticed that the light behind the Dig Dug and Kickman marquees also underlight my toy shelf, some of which is game-related, some which…isn’t so much.
PDF Game Room Remodeling
I’ve got a thing for astromech droids and light cycles.
Atop the bookshelf right next to my desk area, I went back to a tried and true idea that’s been there for over a year, the old Star Trek marquee/model display. I had dismantled it for moving purposes, but now it’s right back where it was, and ready to be backlit again. As for the wall you really haven’t seen (because there’s really nothing there, it’s the wall that both the bed and desk are up against), here’s a look:
PDF Game Room Remodeling
The three-head tree light has three different-colored bulbs in it. This means that the only white light in the room that isn’t behind a marquee is the overhead light. And that’s just how I like it.
This brings us back to the A/V rack, where I propped up a few sturdy marquees. I really have no way to backlight these, sadly – I’m quite literally out of power outlets, and out of fluorescent lights to plug into them anyway. But that’s okay. It’s a nice bit of ambience. As is the whole thing, really:
PDF Game Room Remodeling
The gap on the upper right hand of the rack is awaiting an identical broadcast monitor for video duplication work.
All in all, it’s pretty much turned out how I hoped it would. Colorful, dark and bright all at the same time, bursting at the seams with some of my favorite stuff from my childhood and from now, and actually pretty functional and ready to rock when all is said and done. It’s almost as much fun to sit back and admire as it is to play games in here. There are a few finishing touches waiting to be made, but nothing major, and probably nothing you’ll be interested in at this point.
Whew. I’m bushed. OK, it’s someone else’s turn to do this.… Read more

Categories
Gaming Home Base

Game Room Remodeling Diary, Episode 5

What a day, what a day. Cancelled a planned afternoon of thrifting because I got a call from work that severe weather will more than likely mean I’ll be called in tonight (see here to look at my local radar – I’m in Fort Smith, and red = bad). So I’m watching KTUL do wall-to-wall coverage of a major tornado outbreak near Tulsa, feeling unusually strong breezes blasting through my open window, and wiring up a killer game setup. Sadly, I’ve realized that I’m running out of room for systems and may have to revise some plans – and I still have more consoles en route to me from recent trades and eBay conquests. Sheesh. This room ain’t big enough.
But that’s not gonna stop me.
Today’s shots aren’t very photogenic, but they’ll show you where I’m headed. Some of my least-often-played consoles will live in the bottom of the entertainment center, as well computers which need additional dust protection due to keyboards, vents, etc.
PDF Game Room Remodeling
This means the Apple IIc, the 7800, the Atari 400 (still not a single game for the poor thing yet, but ain’t it pretty?), and perhaps the NES will go down there. I have no idea where the Vic-20, C64 or TI 99/4A will go. I’m open to suggestions. I had to find a stable brace to prop up the IIc at an unusual angle so it would fit inside the compartment with its power supply and joystick connected.
You can also see that special sections have been reserved for my frequent flyers, my favorites: the 2600, the Odyssey 2, and the 5200. There’s also some other bric-a-brac sitting there that I’ll find other places for, namely the alarm clock, the stack of VHS tapes, and the TARDIS. On top of the hutch that houses the O2 and the 5200, there will soon be more backlit marquees. The compartment immediately below the 2600 usually has a drawer in it, but the space below that drawer houses a power strip which will drive all of the marquee lights, and will have one slot open at all times for whichever console is currently in action. All of the AC adapters and power cords for all of the consoles and classic computers will live on the same shelf (and yeah, I will be labeling them to avoid things getting too comedic when I try to plug one in and play it). Hopefully it’ll be less of a rat’s nest than it appears to be now. In the shelf below that will sit the dilapidated sound mixer that I now mainly use to monitor audio levels for my video duplication work. It’ll also come in very handy when I start committing direct game footage to DVD-R for use in that mysterious TV project I keep talking about (you see, there is a method to my madness in connecting the games to the A/V gear).
These storms are getting nasty and getting close. Lots of tornado warnings to the west. Hopefully my collection isn’t going to be strewn across the countryside in about three hours, that’d be about my luck.
The home stretch is in sight. More photos soon, hopefully lit up like an arcade and with games up and running. Let me know if you’ve got any ideas for where the Commodore machines can live, ’cause I’m just about out of ideas.… Read more

Categories
Gaming Home Base

Game Room Remodeling Diary, Episode 4

Still concentrating mostly on wiring (and I still need to go pick up and extra power strip), but the Intellivision and Colecovision are now set up in their new homes, complete with backlit marquees:
PDF Game Room Remodeling
Tabletops are topsides with some more marquees (again, backlit). The Four shelves of rectangular objects are the magazines for my Pioneer CD changer.
A look at what’s up and running so far, with and without overhead light:
PDF Game Room Remodeling
All video is now hooked up, and I’m only a few cables away from having some consoles hooked up and ready to rock (I’ll do that on Saturday, in addition to putting the 2600 into the small shelf below the TV seen at right). All of the consoles requiring RF adapters will, as before, run through a VCR with dead tape mechs but a functioning tuner, only this time audio will also run through an ancient Archer stereo reverb unit, giving their audio more presence (and even, if for some reason I’m feeling kinda wacky, lotsa echo; most times I just put a little minimal echo in to give it a stereo effect).
Coming soon: more backlit marquees, more consoles, and an experiment to see if I can keep 10+ consoles hooked up on hot standby without requiring a single wire swap.
My electricity bill just jumped 40% taking these pictures. Probably won’t leave the marquees on all the time.
Here’s a rough floor plan of the room as it stands now, so you know what the heck you’re looking at:
Floor plan of the PDF Game Room
Now, probably of little interest to anyone, a look at the spider web of stuff running into my A/V amp, one two input channels of which are devoted to games of one kind or another:
PDF Game Room Remodeling
I still haven’t figured out how to remote control my amp with the video touch pads.
A look at the now-fully-functional video setup (whose rewiring yielded some tremendous unexpected benefits):
PDF Game Room Remodeling
I’ve tried playing some PSX stuff with that joystick at standing height, and all I gotta say is FREAKIN’ COOL. I wanna get a coin door with the slots and hang it from that shelf just for the feel of it.
And a closer look at the INTV and Colecovision shelves:
PDF Game Room Remodeling
Just you wait, though. I’m not even CLOSE to done here. Though not everybody likes the new look yet. Ever had a big sleepy white cat give you a look that says “Would you stop movin’ everything around, and get Expansion Module #2 out of my damn way?” I sure have.
Game Room Remodeling
More goodness tomorrow. Enjoy!… Read more

Categories
Gaming Home Base

Game Room Remodeling, Episode 3

PDF Game Room Remodeling
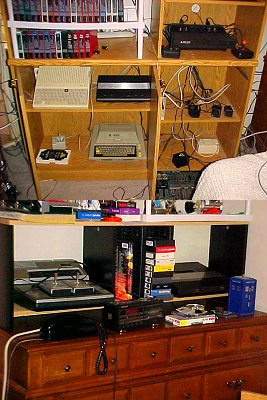
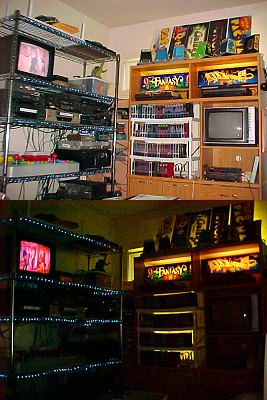
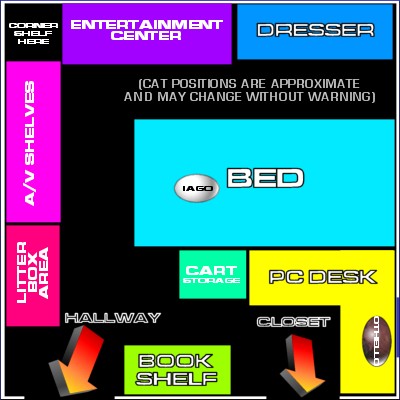
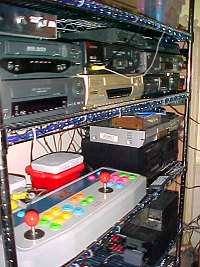
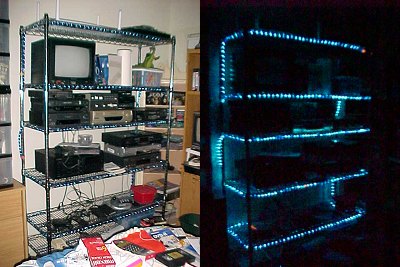
Okay, I’ll admit, I didn’t do crap today. I opened my eyes and found that I couldn’t move. I tried to do a little bit of wiring hookup, but didn’t get much accomplished there. So for today’s accomplishment, I pretty much settled for deciding where everything would go, and preparing a place for my PS1s and their Great Big Joystick.
The machine on the left is an unmodded U.S. PS1, the right-hand machine is a Japanese PS1. I’ll just swap the power, video and controller cables back and forth as needed. While this may seem like an odd setup, what you don’t see is that 15-inch broadcast-resolution color monitor at eye level, giving the whole thing that upright-arcade-cabinet finesse. And though the flash from the photo wipes it out, the blue rope lights give the buttons on the joystick console a very cool arcade touch (think of the blacklight effects from a Tron cabinet). And the support pole on the shelf is not as obstructively close to the left stick as it may appear in this photo.
Have I mentioned how great a game of Robotron I now get out of my Playstation with that stick? No? Thought I had. I’ll tell you more about that later when it’s all plugged in.
That’s it. Also cleaned off some shelf space for other systems, and scoped out some lighting prospects for marquees, etc., as well as adding a string of red rope lights underneath my computer desk. Oh, and I vacuumed too. Then I laid back down, took a nap, and let my cats walk on my aching back.
Ouch.
More progress tomorrow. Hopefully.… Read more

Categories
Gaming Home Base

Game Room Remodeling Diary, Episode 2

Othello and Iago
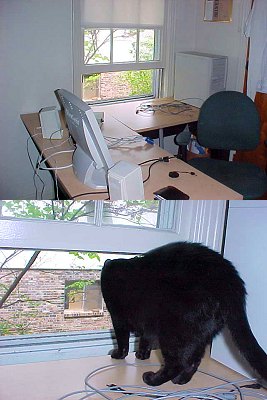
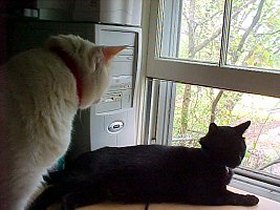
As I type this right now, I’m drenched with sweat, my hands are shaky, my muscles are achy, and my cats are happy. For today, I jostled the dresser, bed, computer desk and the drawer unit I use to store cartridges into their new positions. Everything worked as planned, and I’m sitting next to an open window as I type this, with a glorious breeze blowing on me and happy cats curled up, looking out at all the yummy birds and taunting the neighbors’ irritating little dog.
My back is actually to the only-occasionally-accessed closet, and putting the desk in this corner has not only opened up a ton of walking space, but makes the room seem so much bigger from where I’m sitting. I’m not facing directly into a wall just two feet ahead of me anymore.
PDF Game Room Remodeling
Whenever I move my PC, it’s a hard-and-fast rule that it be hooked up again, online and fully functional the same day I move it. (Same goes for the bed, which is now just behind the desk – so whether they’re in the window or snoozing on the bed, wherever my cats are, I can see ’em. Sounds silly, I know, but it works wonders for my peace of mind and generaly happiness.) So this concludes today’s moving.
Ouch…ouch…ouch…need vacation…need massage…need more sleep…
I promise I’ll get around to showing something to do with game consoles within the next two days. But I can see my Intellivision and my 5200 from where I’m sitting, beckoning me to hook ’em up and play ’em. … Read more

Categories
Gaming Home Base

Game Room Remodeling Diary, Episode 1

As I mentioned earlier this year, the lovely Mrs. PDF and myself were planning a move into a larger, and nicer, house than the one we’re in.
Well, due to circumstances beyond our control, that house slipped out of our grasp. The bitch of it is, I was already boxed up and ready to go, and had bought a brand new steel shelf unit to house my A/V gear (and maybe at least part of my game collection), as well as some rope lights for some mood lighting.
Despite having only 12×12 feet to work with, an L-shaped computer desk whose sides measure 5 feet across, a freakin’ huge new piece of furniture to incorporate, and being stuck with having to jam a twin bed, a dresser and the litterbox into this room with my goodies (as my cats sleep in this room and, paradoxically enough, when I’m in the doghouse, so do I)…I am embarking on a redesign of my room anyway.
My criteria are:

  • Mood lighting: There’s only one overhead light in the room, and I’ve made a few provisions to backlight marquees, but there’s really not much else. I don’t like direct light – I like to hide the light source and bounce the light off of the walls and ceilings, and I like dim light, nothing too overpowering. In such a small space, this isn’t terribly feasible, so I’ll settle for my other favorite lighting element: color.
  • A/V equipment: The real reason behind the new shelf unit, the A/V gear is something that actually makes me money, and the new shelf is open on all sides (and the shelves themselves are grated), allowing for ventilation, which is a severe problem in here.
  • Show off the collection: Well, as much as I possibly can with a room the size of the space shuttle’s flight deck. It’s not all for show, either – it’s nice if the games are accessible, and important that I can punch up what I’d refer to as my “major consoles” pretty quickly. Stuff like standalone dedicated consoles aren’t really prime contenders for this limited real estate.
  • Get the PC out of the corner: That’s where I spend most of my time. One of my main goals is to get the computer out of the corner, so I can be facing some space instead of a wall when I’m there. And the closer I can move it to the one window in the room, the better, so I can get some real live sunlight in there and see storms coming in (actually kinda important in this part of the country).
  • Come up with something that isn’t so wild that I’ll wind up being divorced and having to move it all again in a few months anyway. Self-explanatory.

I know it’s gonna be cramped. It already was to begin with. With the new shelf, though, it’s gonna be cramped cramped – zero G would be a big help, because then I could put the bed on the ceiling and get it the hell outta my way. As it is, the space shuttle analogy won’t be entirely out of place.
I’ve come up with a new layout that will alleviate some of these problems, and maybe – God willing – put my computer desk right in front of the window.
I’ll provide updates here so those who care can chart my progress, and laugh at the sardine can I use for a game room/office/spare bedroom/kitty playground.
Phase 1
Brought in the steel shelf unit, and loaded all of the A/V gear into it. I like. Blue rope lighting installed up underneath the rim of each shelf so I have mood light and the minimal work light I need to operate gear which, for the most part, provides plenty of its own light – this is going to be LED grand central station. Good God, but I’ve got a ton of crap to put in here. Seen here with and without room lighting:
PDF Game Room Remodeling
Not everything is in its final place here; the A/V gear certainly won’t be as crunched together as it might appear here.
That’s really the extent of my progress for day 1. I know it doesn’t look like much, but you try unhooking, moving, and starting to reconnect an entire small-A/V-studio setup. More to come soon. Enjoy, and feel free to share suggestions – that is, suggestions that will work in that size room.… Read more